Configure greytHR Visage
Updated in June-2023
greytHR Visage is a facial recognition-based attendance management system offered by greytHR. It utilizes facial recognition technology to accurately track employee attendance, replacing traditional methods such as manual registers or swipe cards.
Configuring the greytHR Visage refers to the process of setting up or customizing the features and settings of the greytHR Visage module within the greytHR software platform.
Capture employee's photo for Face Recognition
The greytHR Visage Kiosk, a play store app, captures touch-free attendance from the office premises. The kiosk is based on facial recognition technology. This means that an employee's attendance is captured based on his/her facial recognition. Once the attendance is captured, the swipes are transferred to the admin portal. From the admin portal, the admin can view the attendance swipes' details. Some of the benefits of using a kiosk for capturing attendance are as follows:
Minimalistic touchpoints while entering and exiting the offices.
No requirements to carry RFIDs for signing in and out.
Replaces biometrics - fingerprint sign-in on the same device
Curbs proxies.
Curbs Tailgating.
Reduces cost of biometrics investments and maintenance.
As an admin, to set up a kiosk, you must perform the following actions:
Enable kiosk in new features.
Create a kiosk admin.
Upload employee’s photos.
Configure visage for required attendance scheme.
Configure kiosk admin permissions in user roles.
Duties of kiosk admin.
View swipes on the employee swipes page.
Enable kiosk in new features
To enable kiosks in the greytHR application, contact our support team. They will enable the kiosk for you.
Note: You can use Biometric devices or a Visage application to mark attendance. If you use both methods, the in/out indicator is not displayed properly for the employee swipes.
Device specifications for installing greytHR Visage
A mobile or tablet running with the Android operating system.
The Android version must be eight or higher.
The camera resolution of the device must be 5MP and above.
The device must have a minimum of 1GB of RAM.
Create a Kiosk Admin
To set up the kiosk, you must first create users, such as Kiosk, Kiosk1, and then assign permissions. To create users, perform the following actions:
In the admin portal, navigate to the Settings page.
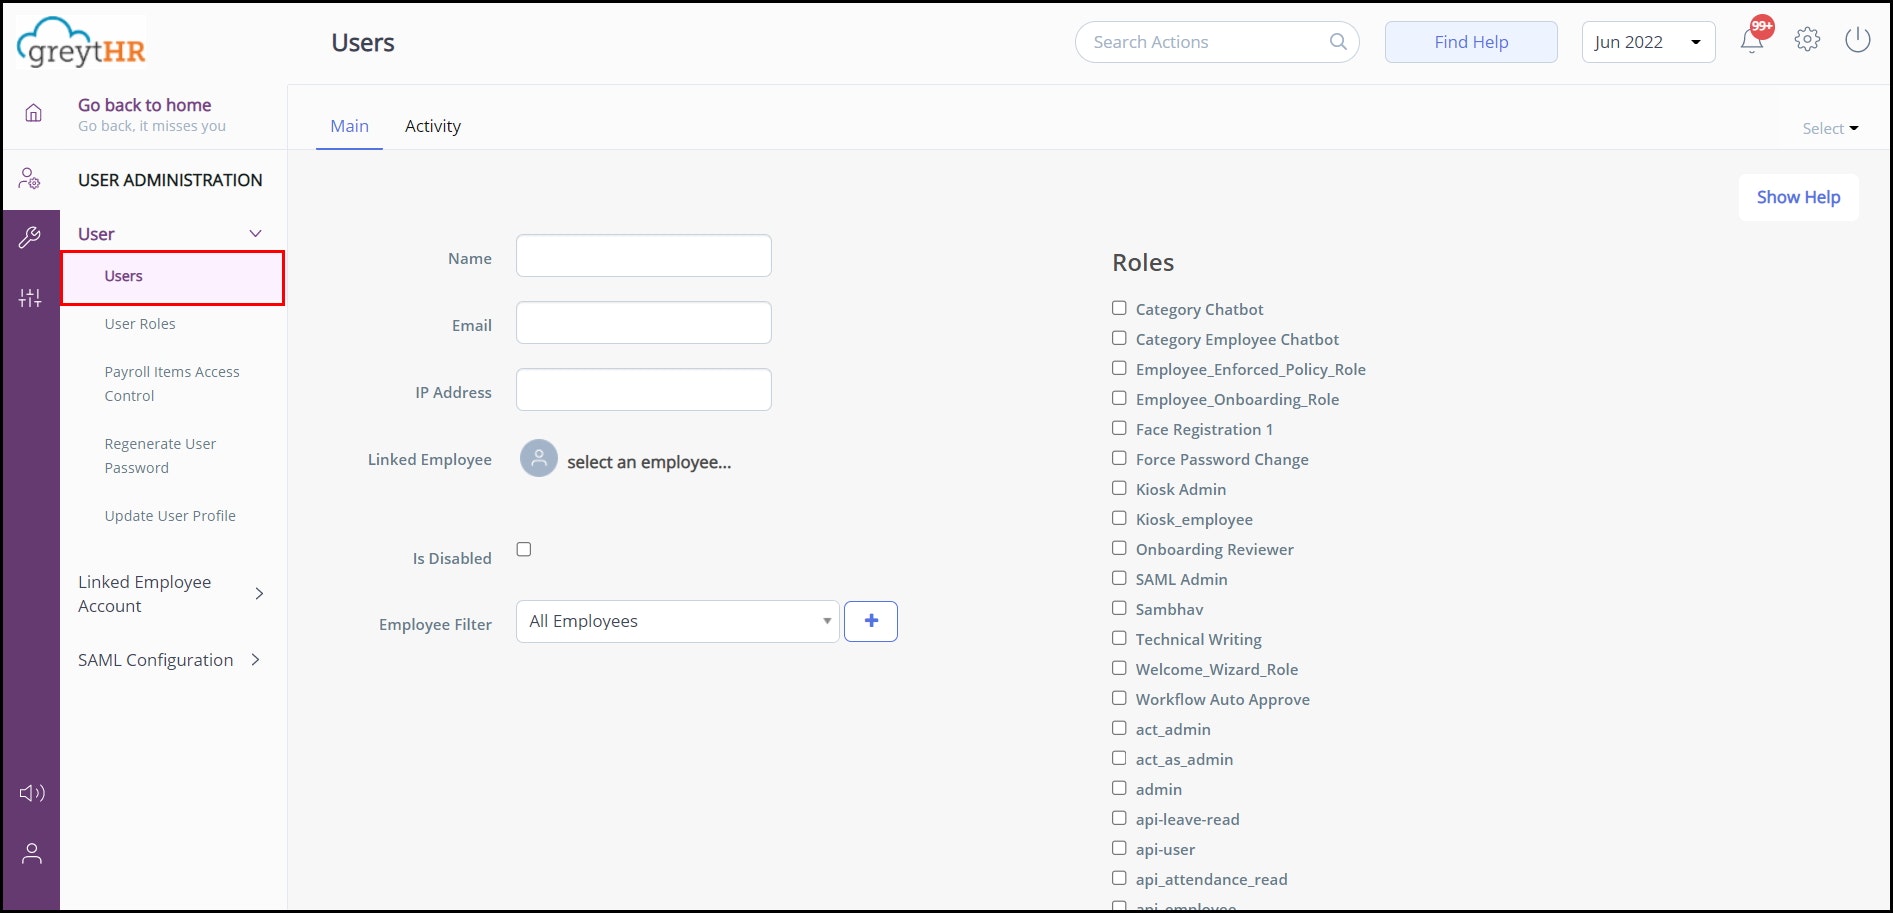
Go to User Administration > User > Users.
Click Add User to add a named user.
Enter the Name and Email and select Kiosk Admin and Kiosk_employee checkboxes from the Roles list.
Click Save User.
Note:
If the Employee search is not working, click the employee check box under the Roles list.
If required, the customers can create multiple kiosk users, such as Kiosk 1, Kiosk 2, and so on.
Upload employee photos
For the facial recognition attendance system, all the employees' photos must be in the system. As an admin, you must upload all the employee's photos in the greytHR application and then migrate them to the kiosk. You can upload the photos individually or in bulk.
To upload an employee's photo individually, perform the following actions:
Navigate to Employee > Information > Employee Profile.
In the select an employee search box, enter the employee’s name/number.
Click Upload Photo. The maximum file size allowed for a photo is 250 MB.
To upload employees' photos in bulk, perform the following actions:
Navigate to Employee > Admin> Bulk Photo Upload.
Click Upload Zip File.
Configure visage for required attendance scheme
To configure Visage for attendance scheme, perform the following actions:
Navigate to Settings > System Settings > Attendance > Attendance Scheme.
Click the Edit Scheme Info icon of the required attendance scheme for which you want to configure the visage.
On the Edit Attendance Scheme page, under the Swipe Capturing Method list, select Kiosk.
Configure kiosk admin permissions in user roles
To configure permission for Kiosk Admin, perform the following actions:
Navigate to Settings > User Administration > User > User Roles.
On the User Roles page, click the Edit icon against the Kiosk Admin user role. Edit User Roles page opens.
In the Edit User Roles page, from the Category dropdown list, select Kiosk.
Under Face Registration from Visage feature, select Read Access and Write Access to provide access to the kiosk admin to Register Faces feature.
Click Save to configure access to kiosk admin for Face Registration feature.
Duties of kiosk admin
After you have assigned the Kiosk Admin role to an employee, the kiosk admin must download, set up, and maintain the kiosk. Setting up of the kiosk is divided into three steps:
Installing the greytHR visage application
Configuring the login
Changing kiosk settings
Capturing employee’s photos for face recognition feature
Initiating kiosk
Install the greytHR visage application
On your Android mobile device, using the play store, Install the application, greytHR Visage.
Configure the login
To configure your kiosk admin login, perform the following actions:
Open the greytHR Visage application and tap I know. A new screen appears.
Specify the exact domain URL in the text box. The domain URL will be in the format domain.greythr.com. Example: hr.greythr.com.
Tap Next. You are redirected to the Login screen.
Enter your Employee No and Password. Tap Sign In.
Change kiosk settings
To change the kiosk settings, perform the following actions:
After signing in, you are redirected to the Kiosk dashboard. Under Settings, tap Change Now.
On the Kiosk Settings screen, specify all the details:
Swipe In: When you select Swipe In, all the swipes registered through the kiosk are considered as entry swipes. On the Employee Swipe page, swipes are marked as In.
Swipe Out: When you select Swipe Out, all the swipes registered through the kiosk are considered as exit swipes. On the Employee Swipe page, swipes are marked as Out.
Both: When you select Both, all the swipes are identified as either Swipe In or Swipe Out. On the Employee Swipe page, the first swipe is marked as In, and the last swipe is marked as Out. The rest of the swipes are not differentiated.
After selecting Both, you must also select Allow the system to identify every In/ Out swipe type in the application.
To select the option, navigate to Settings > System Settings > Attendance > Attendance Options.
Enable Audio Message: You can enable this option if you want a voice-over of the message displayed on the screen.
Door Name: Specify the door name of the office at which the kiosk is placed. All the swipes are tagged with the door name.
Wait time between swipes: This setting configures the time in seconds. The seconds you specify here is the time gap between two swipes.
Instruction Message: Specify the instructions to be displayed to all the employees for capturing attendance.
Tap Save.
Capture employee's photo for face recognition
After the kiosk admin permissions are configured on the User Role page, you can view an additional tab named Register Faces on the Kiosk dashboard. Using the Register Faces tab, you can capture and update an employee's photo in the kiosk database. This step can be completed when an employee is marking attendance in front of the kiosk.
To register an employee's photo at the time of marking attendance, perform the following actions:
Navigate to the Kiosk dashboard.
Tap Register Now to select an employee to capture a photo. You are redirected to the Register Faces screen.
On the Register Faces screen, in the employee search box, specify the employee's name/ID.
Tap Capture new photo to activate the camera and take a photo of the employee.
Click Save to update the photo in the kiosk database. The employee's photo is captured and updated in the kiosk database.
Initiate kiosk
Initiating a kiosk means activating the kiosk to capture attendance based on a facial recognition system. To initiate a kiosk, perform the following actions:
Navigate to the Kiosk dashboard.
Tap Initiate Kiosk to start the touch-free attendance system. You can now capture the employee's face.
View swipes on employee swipe page
After the greytHR application is configured by the kiosk admin, the admin can view the employee swipe on the Employee Swipes page. To view employees' swipe details, perform the following actions:
Navigate to Leave > Information > Employee Swipes.
On the Employee Swipe Details page, select Kiosk from the Type dropdown menu.
Select the required dates from the Date dropdown calendar.
Click Ok.
Note: The face recognition feature works on blink detection. The user must blink to mark the attendance.
Other related links:
Was this article helpful?
More resources:
▶ Video - Watch our how-to videos to learn more about greytHR.
❓ FAQs - Solve your queries using FAQs.
📢 Product Update - Read about the product updates.